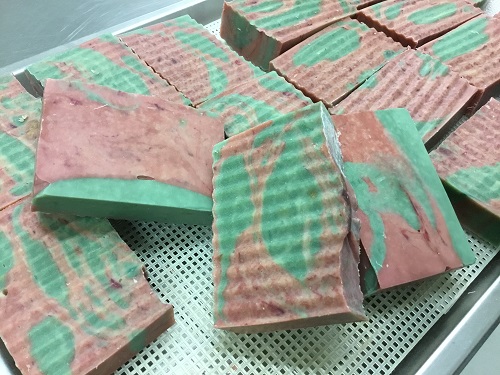
Goat’s milk soap is renowned for being gentle on the skin and suitable for individuals sensitive to chemicals or other soaps. I make it regularly, and it doesn’t require much more effort than water-based cold-process soap, so why not give it a try?
Ingredients:
- Goat’s milk (pasteurised and frozen) 280 grams
- Sodium Hydroxide (Caustic Soda) 120 grams
- Coconut oil 240 grams
- Sustainable Palm Oil 160 grams
- Cold Pressed Australian Olive Oil 400 grams
- Rose Geranium Essential Oil, 10 ml
- Frankincense essential oil 5 ml
- Mauve Mica, one tablespoon
- Starlight Green Mica, one tablespoon
Safety: When added to any liquid, caustic soda forms a strong alkaline solution that can cause burns if it comes into contact with your skin. You must be careful not to spill or splash any on yourself during the soap-making process. If you get any on your skin, rinse it immediately with cold, running water. Always wear your safety glasses, goggles, and rubber gloves before handling caustic soda. Always add the caustic soda to the liquid, not the other way around. Even after you have mixed the caustic soda solution with your oils and created a soap, the soap mixture can still burn you, as the saponification process is not complete until the soap is cured. The soap mixture remains very alkaline and can still cause burns.
Instructions:
- Milk that is used in soap-making must be treated first to prepare it for the soap-making process. You do this by ensuring that your milk is pasteurised. This is easy if you purchase your milk from the grocery store, as this milk will already be pasteurised.
- The second thing you need to do with the milk is to freeze it. I pre-measure my milk into 280-gram batches and freeze them overnight, taking one out of the freezer in the morning and letting it start to thaw before I begin my soap-making. I want this milk to be cold and even partially frozen, like a slushy, when I add the caustic soda.
- Place your goat’s milk slushy into the container you will use to make your lye solution, and then submerge this container in a sink of cold water, adding ice cubes to the water. You want this iced water to reach up to the level of the milk in your container. Be careful not to add too much water, as your container will start to float and may spill.
- Put on your rubber gloves and your safety goggles. Using an accurate kitchen scale, carefully weigh out all your ingredients. I measure my caustic soda first, then place it into a small dry bowl. Measure each of your oils and place them all together into your soap pot or stainless steel bowl.
- Slowly add a small amount of your measured caustic soda to the milk. As it starts to dissolve, it will start to heat up. Stir the solution gently, then wait for it to cool. As a general rule, you want to avoid solutions that exceed 38 degrees C.
- Add more caustic soda, and follow the same procedure, waiting until the solution cools down. Continue to do this until you have added all the caustic soda to the milk.
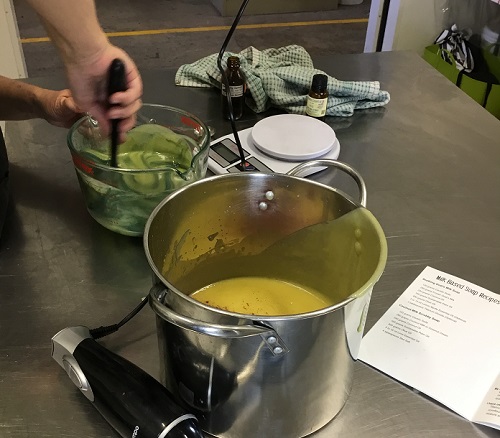
- The solution will change to a golden yellow as you mix in your caustic soda. This is natural and does not indicate anything is wrong. This colour will be transferred to your soap. Just be sure it does not get heated above 38 degrees C, as this will make it much darker and produce an offensive smell.
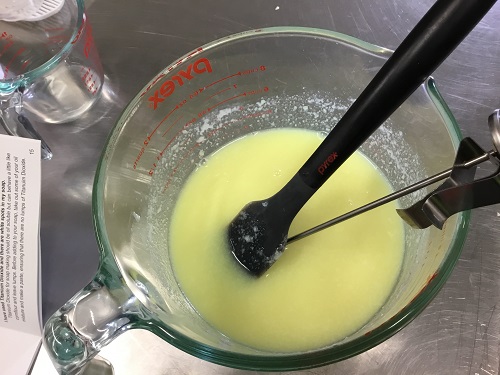
- While you are gradually adding caustic soda to the milk, go ahead and melt your palm and coconut oil. Then add your olive oil, which will not need to be melted.
- Once you have prepared your caustic soda/milk solution and melted your oils, you must equalise their temperature until they are the same, somewhere between 34°C and 38 °C. To do this, use hot and/or cold water in the sink and place the jug and/or bowl into the appropriate water. You will need a thermometer to monitor the temperature. When they reach the same temperature, you are ready to mix them together.
- Once the oils and the caustic soda solution reach the same temperature, you can pour your caustic soda solution into your oil mixture. Wearing rubber gloves and safety glasses, slowly drizzle the caustic soda solution into your oils while mixing. If you plan to use a free-standing or hand mixer, set it to its lowest speed. A free-standing mixer allows you to move away when mixing and avoid getting any small splashes on you. If you use a handheld mixer or stick blender, be sure to have long sleeves and rubber gloves, and that the bowl is large enough to work without getting splashed. It is faster with a stick blender.
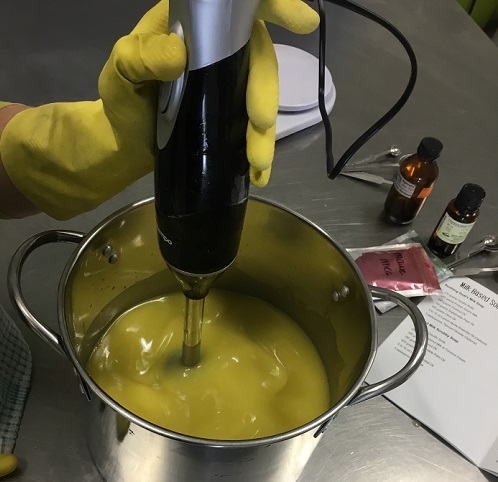
- Keep mixing until the soap mixture starts to thicken. As the mixture starts to thicken, you need to test for trace. To test for trace, use a spoon to pick up a small amount of the soap mixture and drizzle it across the top of the remaining soap mixture. If it is not ready, the drizzle will immediately sink back into the soap mixture, leaving no trace. However, as it thickens and you test the mixture again, a small amount of the soap mixture, when drizzled onto the remaining soap mixture, will leave a faint pattern before sinking back into the mixture. This is called trace. You do not want to wait until the trace is thick enough for the pattern to remain on the surface, as this will then be too thick to pour.
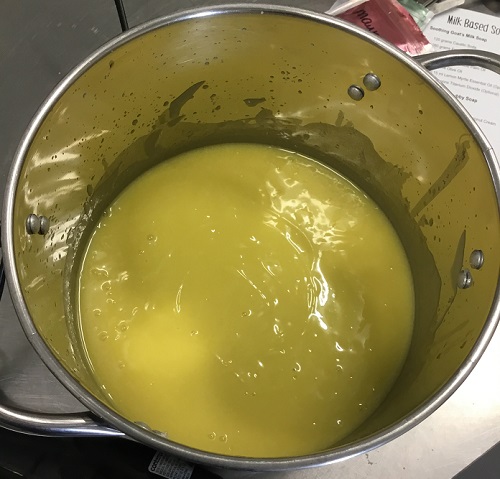
- Once your soap has reached trace, you can mix in your essential oils and colour. Mix in your essential oils.
- I used two colours to get the effect I was looking for. Pour about half of the soap mixture into another jug for this step. Then add the colours and mix them in.
- If using silicone soap moulds, place them onto a tray, such as a baking tray. Carefully pour your soap into the mould(s).
- Begin to pour the soap into the corner of the loaf mould. Then change to the other colour and pour it on top of the first colour. Continue to do this, changing colours back and forth until the mould is full.
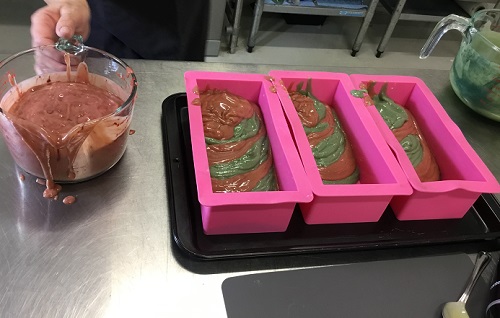
- If the surface is not smooth after you pour your soap, give it a gentle shake, and it will smooth out. The same applies if you are using some other container as a mould.
- Cover your soaps with another tray or a cardboard box. Wrap your mould(s) in insulating material such as a blanket or old towels to keep them warm. Place them in a warm location. I usually use my kitchen, as this is the warmest room in my house.
- Allow your soap to sit undisturbed for 24 to 48 hours.
- Check your soaps for firmness. They should be firm to the touch but not rock-hard. If it is still too soft to remove from the mould(s) without damaging the shape of the soap, leave it for a longer period. Once it is firm to the touch, simply pop the soap out of the mould.
- Cut your soaps with a soap cutter to the desired size and place them on a plastic needlepoint screen, sushi mats, or a similar surface to air dry. You want something that will allow air to circulate around the soap. Turn your soap over once a week.
- Allow your soaps to cure for six weeks before using them. This allows for the saponification to be completed.
What you can do is limited only by your imagination. This simple goat’s milk soap smells divine, and I love the colour combination and random pattern. You will note that it looked a little thick when I was pouring it into the moulds. In truth, I mixed it just a bit too long as I was trying to get a good photograph of trace. Thinner would have been better.
As always, live well.
Valerie