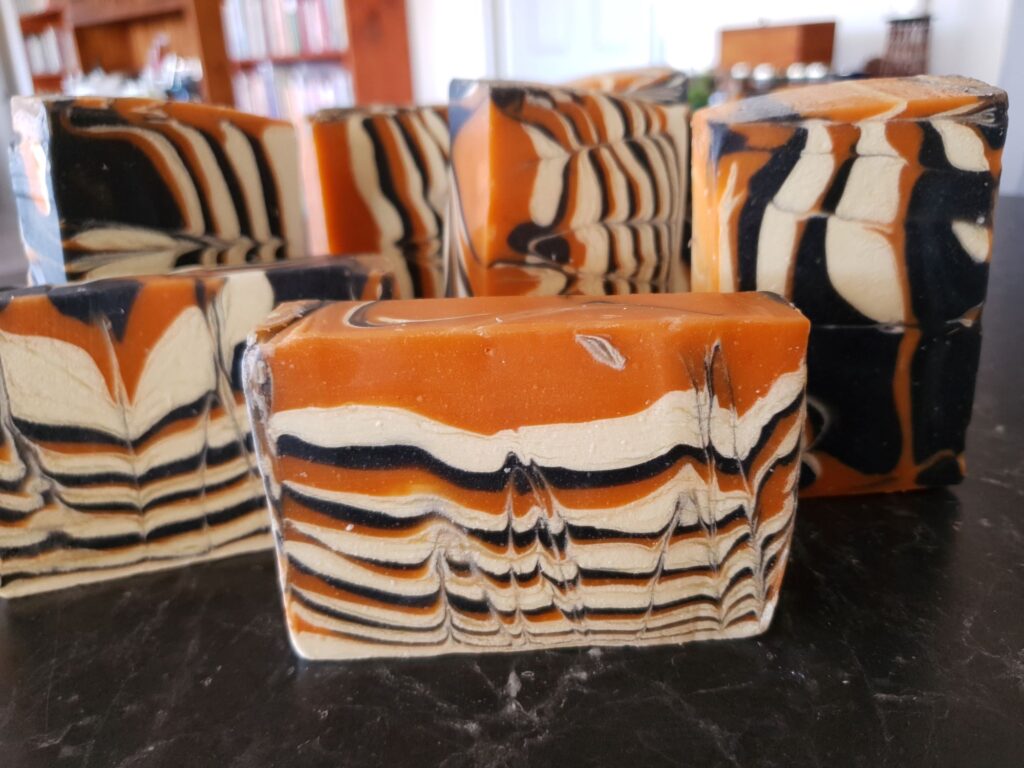
I love Halloween. Any excuse to decorate my home is high on my list, and with Halloween, it’s especially easy. All you need to do is focus on a black and orange colour palette. I have provided you with the colour palette I decided to use and have followed up with some ideas to get you started.

Once you have your colour palette, take a look around your house and find items you already have that match. I located some bright orange candles that I set up on the sideboard, along with a few wooden cutouts of a ghost, a pumpkin, and a black cat from last year. Then, I pulled a few pumpkins out of storage from the previous year to complete my look. I admit that there wasn’t much in black and orange around my place, so I had to pick up a few things. Not wanting to waste money, I got creative and only purchased items that would be both useful and decorative. Here are a few ideas:
- A few more orange and black candles. They will come in handy when the power goes out.
- A black tablecloth for the dining room table.
- Some oranges, which I placed in a bowl on the dining room table.
- Potted orange chrysanthemums. They will end up in the garden and will be in full bloom this time next year as an added bonus.
This October’s most fun project has been making Halloween soap. If you are interested in soap making, you should give this one a try. I used the Beginners Soap Making Kit. It was a basic kit without the moulds. You can see them here: Soap Kits.
Here is the recipe, including a list of ingredients, equipment and detailed instructions.
Shea Butter Halloween Soap
Safety: When you add Caustic soda to water, the resulting lye solution increases the temperature significantly. It is also a strong alkaline solution and will burn when it comes into contact with your skin. Be careful not to spill or splash any of this solution on yourself during the soap-making process. If you get any on your skin, rinse it immediately with cold, running water. Always wear your safety glasses, goggles, and rubber gloves before handling caustic soda. Always add caustic soda to the water, not the other way around. Even after you have mixed the caustic soda solution with your oils and created a liquid soap, the soap mixture can still cause burns, as the saponification process is not complete until the soap is fully cured.
Ingredients:
For the Soap batter
- 200 grams of Coconut Oil (in the kit)
- 200 grams of Sustainable Palm Oil (in the kit)
- 400 grams of olive oil (available at your local supermarket)
- 50 grams of shea butter (in the kit)
- 122 grams of sodium hydroxide (from the hardware store)
- 273 grams of distilled water (In the cleaning section of the supermarket)
Total weight of batch = 1235 grams
- 15 to 20 ml of essential oils of your choice. I will discuss this further later.
For the colours
- Two teaspoons of Activated Charcoal stirred into three tablespoons of olive oil.
- One teaspoon of Orange Sorbet Mica in three tablespoons of olive oil.
- Three teaspoons of Titanium Dioxide mixed into a small amount of warm water.
Essential oil blend
For my essential oil blend, I wanted something that reminded me of pumpkin pie, a Halloween and Thanksgiving tradition in America that I loved while living there. It is more for Thanksgiving, but pumpkins are a big part of Halloween, so the pie is on my mind for dessert. I used the following essential oils in my blend.
- The teaspoons of Bergamot Essential Oil
- One teaspoon of Lavender Essential Oil
- Half a teaspoon of Australian Orange Essential Oil
- One-quarter of Clove Bud Essential Oil
Equipment
- Safety glasses or goggles should be worn to protect your eyes whenever you are handling soap-making ingredients.
- Rubber gloves
- Scales to measure all of your ingredients
- A pot to melt your solid oils in (or a large microwave-safe jug)
- Heat-proof jug to mix up your lye solution
- Thermometer ( I use two when making soap)
- Stick blender
- A loaf-shaped soap mould (1200 ml)
- Three 500 ms jugs, one for each soap batter colour
- Three small jugs to mix your colours in
- Several spatulas, I would say at least three.
- Curing rack and tray
- Soap Cutter
Step-by-Step Instructions
- Before starting your soap-making, gather all the necessary equipment and ingredients. There is nothing worse than being partway through a soap recipe and discovering you do not have something you need. As soap making is a time- and temperature-sensitive process, you cannot stop what you are doing and go to the store to pick up what you don’t have.
- Put on your rubber gloves and your safety goggles. Using accurate kitchen scales, carefully weigh out all your ingredients. I measure my caustic soda first, then place it into a small dry bowl. Then, measure your distilled water and place it into your jug.
- Mix your caustic soda solution. Always add your caustic soda to your water. DO NOT ADD WATER TO YOUR CAUSTIC SODA. The chemical reaction can produce significant heat, resulting in fizzing and splattering. Use your silicon spatula to mix the caustic soda into the water. It is best to do this outside or in a well-ventilated room, as you do not want to breathe in any of the fumes that the heating of the solution may create through a chemical reaction. Your caustic soda solution will become quite hot and needs to cool down before it can be added to your oil. Once I have mixed up my caustic soda solution, I carefully place one of my thermometers into the jug to monitor the temperature as it cools.
- Measure each of your oils. Place the coconut oil, Palm oil, and shea butter into your soap pot or a microwave-safe jug if you plan to use the microwave to melt them. Add your liquid oils to the melted solid oils, then place a second thermometer into the bowl of oils to monitor the oil’s temperature.
- Once you have your caustic soda solution made and your oils melted, equalise their temperature until they are the same, somewhere in the range of 34 to 38 degrees. To do this, use hot and/or cold water in the sink and place the jug and/or bowl into the appropriate water.
- Preparing your colours: While you wait for the temperature of the oils and caustic soda solution to equalise, you can proceed with mixing your colours. Using three small jugs, mix up your three colours. Mix two teaspoons of Activated Charcoal with three tablespoons of olive oil in a small jug.
- Mix one teaspoon of the orange mica with three tablespoons of Olive oil in a second small jug.
- Finally, mix three teaspoons of titanium dioxide with a small amount of warm water in the final small jug. Set all three jugs aside for later use.
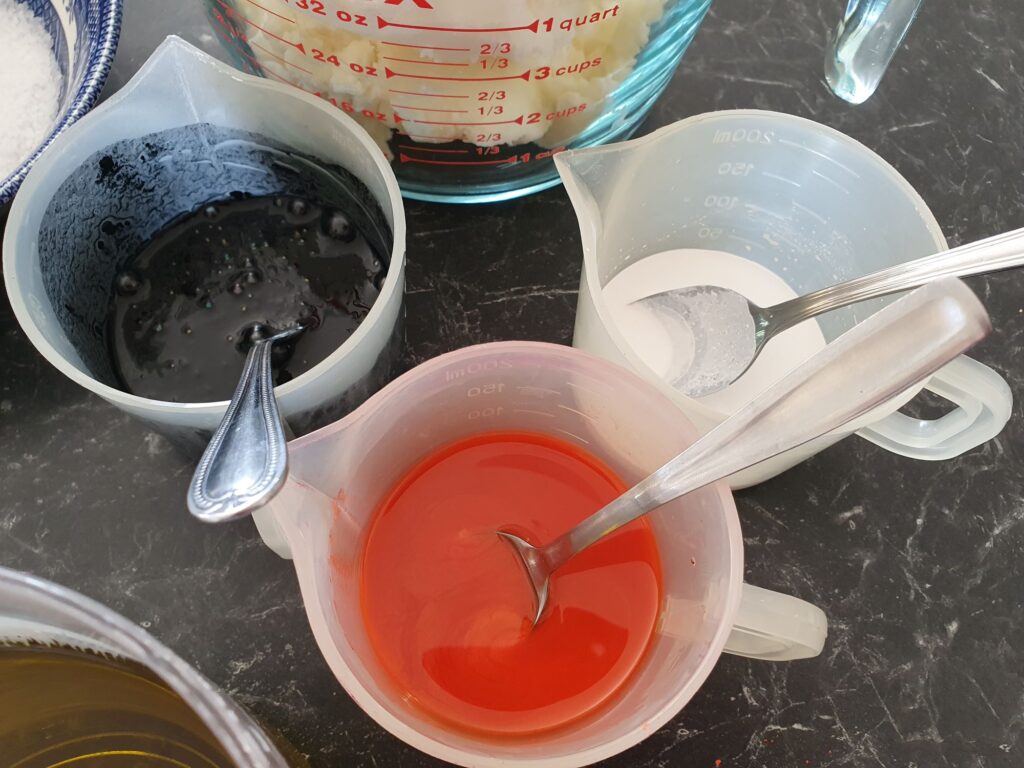
- Once the oils and the caustic soda solution reach the same temperature, or within a few degrees, pour your caustic soda solution into your oil mixture. Wearing rubber gloves and safety glasses, pour the caustic soda solution into your oils while mixing with a spatula.
- Use a stick blender to mix the oils and caustic soda solution until the mixture reaches a “trace” consistency. Trace is when the oil and caustic soda solution are mixed so they will not separate. This is called an emulsion. Don’t mix for too long, as doing so will cause the soap batter to become too thick to work with. To test for trace, use a spoon to pick up a small amount of the soap mixture and drizzle it across the top of the remaining soap mixture. If it is not ready, the drizzle will immediately sink back into the soap mixture, leaving no trace. However, if it is ready, a small amount of the soap mixture, when drizzled onto the remaining soap mixture, will leave a faint pattern before sinking back into the mixture. You do not want to wait until the trace is thick enough for the pattern to remain on the surface, as this will be too thick to pour.
- Once your soap has reached an emulsion stage, mix in your essential oil. Use the blend I recommend or create your own. Mix the essential oils into your emulsion with the spatula.
Colouring and Pouring
- Take the soap batter and calculate the total weight (1235 grams). Divide it into parts based on how much of each colour you want. I wanted it to be 40% white, 30% orange and 30% blank.
- White – 1235 x 40% = 494 grams
- Orange – 1235 x 30% = 370.5 grams
- Black – 1235 x 30% = 370.5 grams
- Place one of the 500 ml jugs on the scales and tare it to zero. Pour the soap batter into this jug until you reach 494 grams. Set this aside. This is for your white.
- Do the same with the other two jugs; this time, aim for 370 grams. Don’t worry about being super exact. It will all work out.
- Mix one teaspoon of the white colour mixture into the soap batter jug with 494 grams of soap batter. If it doesn’t seem white enough, add a little more.
- For the black, mix in half a teaspoon of the black colour mixture. Once again, add a little more if this does not look black enough.
- For the orange, mix in one teaspoon of the orange mica mixture. If this does not look orange enough, add a little more. I admit to mixing it all in and then adding another half a teaspoon of dry mica powder.
- Now you are ready to pour. Place the mould on the counter with one end lifted. I used a rolled-up facecloth on one end to lift my mould.
- Start pouring into the lower end of the mould—first one colour and then the next. I went black, then orange, then white, then black, then orange, then white.
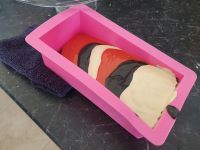
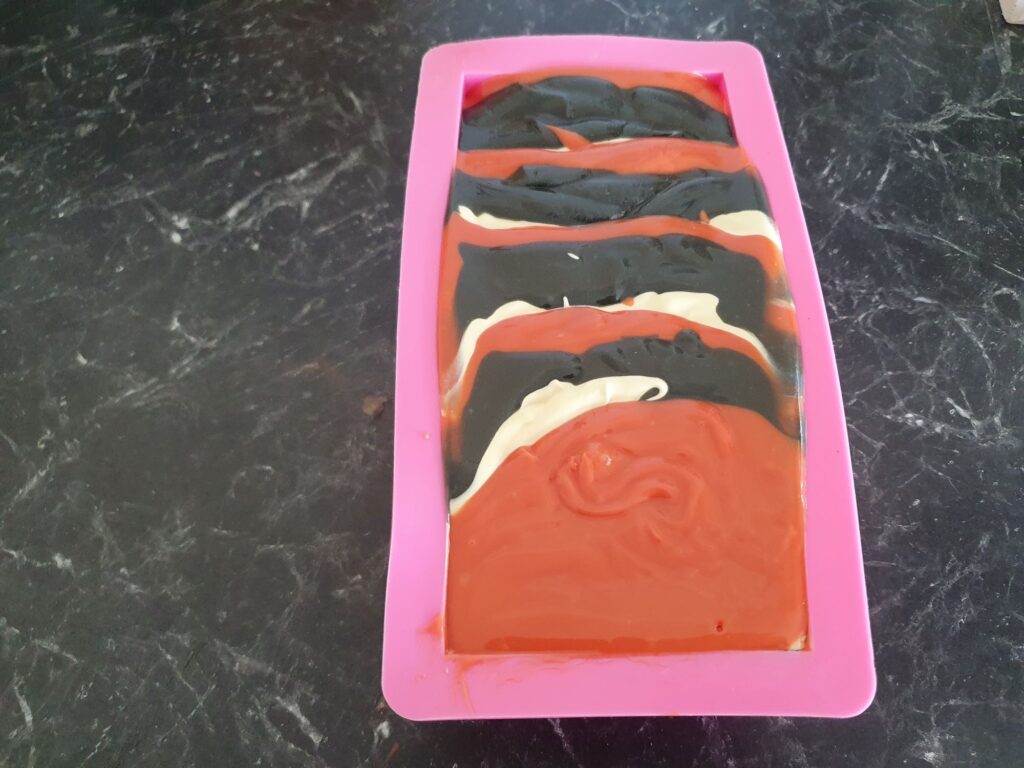
- As you start filling the mould, remove the facecloth and allow the soap mixture to flow along the length of the mould. Give it a little shake to move it along if your soap starts thickening and moving too slowly. Eventually, the mould will be full and sitting flat on the counter.
- Now, take a chopstick or a knitting needle and create your swirls. Place the chopstick into the soap mould in the bottom left-hand corner, all the way to the bottom. Using a figure-eight pattern, move the chopstick back and forth as you move from left to right, ending up in the bottom right-hand corner.
- Once the soap is poured, it is set aside in the mould to cure and harden. It is important to keep the soap war. Cold-process soapmaking involves a chemical reaction called saponification, where oils and lye (sodium hydroxide) combine to form soap and glycerin. This reaction continues even after the soap is poured into moulds. Keeping the soap warm promotes and accelerates saponification, ensuring it fully transforms into its final state.
To keep cold process soap warm after pouring it into moulds, you can use several methods:
- Insulation: Cover the moulds with an insulating material such as towels, blankets, or a foam board to trap heat and keep the soap warm.
- Heating Pad or Blanket: You can use a heating pad or a heated blanket to keep the soap warm. Be sure to monitor the temperature to avoid overheating.
- Curing Oven: Some soapmakers use a curing oven set to a low temperature to keep the soap warm and promote the saponification process.
CPOP = cold process/oven process.
I oven-cured my soap by placing it in the oven set to a warming temperature of approximately 70 to 75 degrees. I preheated the oven, then turned it off and put my soap mould, full of soap, on a tray inside the oven. I left it there for the next three hours. I checked on it periodically to ensure it wasn’t overheating. The chemical reaction of saponification is exothermic, meaning it creates heat. If the soap gets too hot, it can cause the soap to crack or become discoloured.
Cutting your soap
- The following day, remove your soap from the mould. The soap should be hard enough to do this without causing any damage to the soap. If the soap is still too soft, leave it another day.
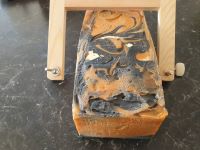
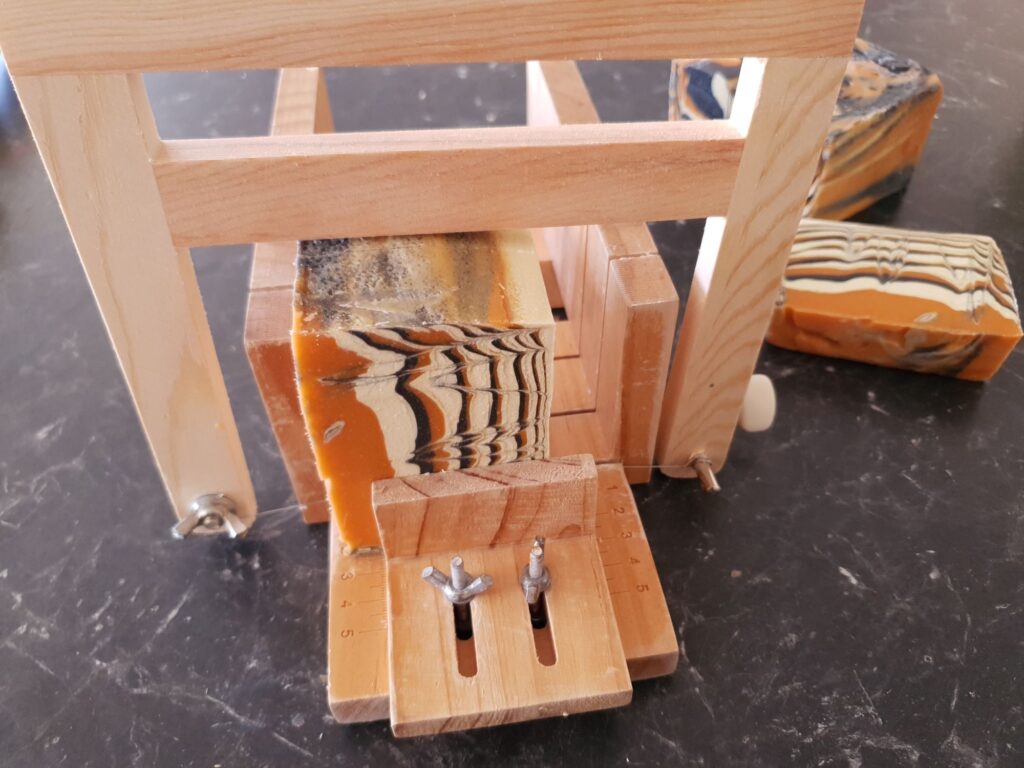
- I decided to cut to eight bars of soap. To do this, I first marked out halfway along the bar and cut the block in half using my wire soap cutter. I then measured and marked out the rest of my bars and cut them into equal-sized pieces.
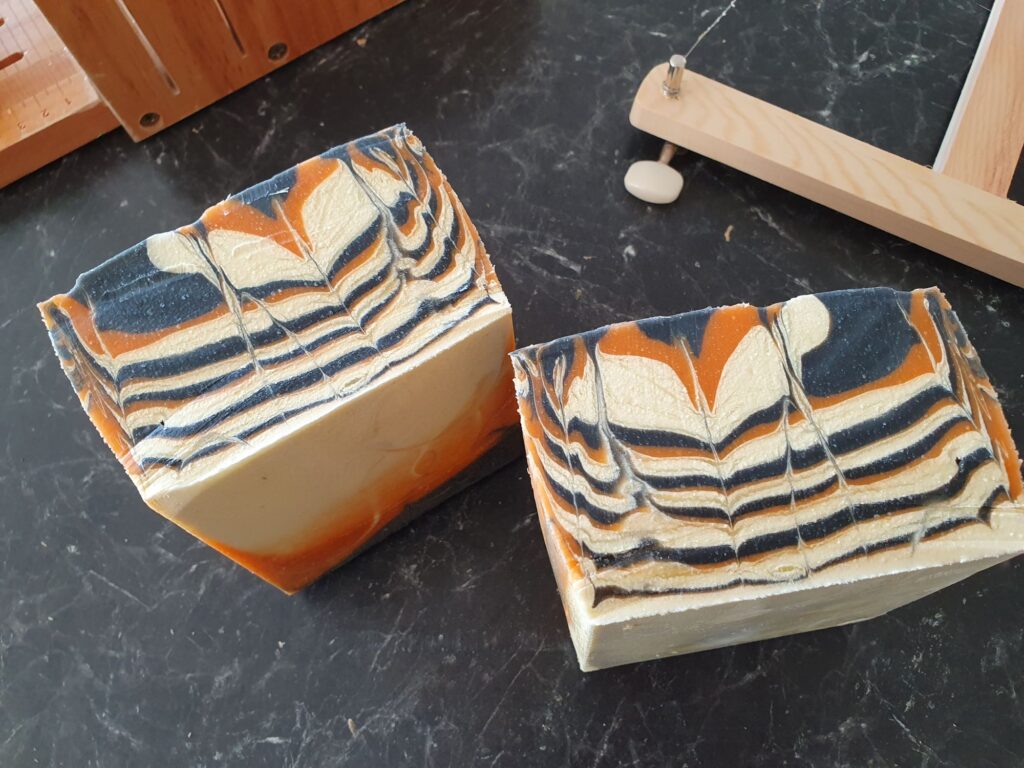
- After they are cut, I clean them up a little, shaving off any rough edges and the tops that do not look smooth.
- Place them on a tray to cure for six weeks before using.
I am so happy with how these soaps turned out. They are sitting on my kitchen counter, and I stop and look at them every time I go into my kitchen. I have a place to store my soap trays, but for now, they can stay on the counter so I can display them.
All always live well
Valerie