SPRUCE UP YOUR CHEESE PLATTER!
I decided to add something a little different to my cheese platters. Check out the little twist in the tail of the classic Green Living Australia 30-Minute Mozzarella.
I hope you enjoy it as much as we do!
Ingredients
- 4 litres full cream milk.
- ½ cup Pesto
- 1/8 teaspoon calcium chloride, diluted in 1/4 cup non-chlorinated or demineralized water.
- One and one-half teaspoons of citric acid powder diluted in ¼ cup of demineralised or non-chlorinated water.
- 1/8 teaspoon of Lipase dissolved in ¼ cup of demineralised non-chlorinated water. (This is optional for increased flavour)
- 1/4 rennet tablet or 1/4 teaspoon liquid rennet diluted in 1/4 cup of demineralised or non-chlorinated water. Important note: If you are using Lipase, increase the rennet to 1/2 a tablet or 1/2 a teaspoon of liquid rennet, as the addition of Lipase makes for a softer curd and the increased rennet will counteract this.
- One to one and a half teaspoons of cheese salt.
Equipment
- Large pot
- Cheese thermometer
- Stainless steel slotted or perforated spoon
- Curd knife
- Microwave-safe bowl large enough for your curds (if using the microwave method)
- Rubber gloves
Directions
- Pour your milk into a large stainless steel pot and add your calcium chloride solution, mixing in well.
- If you will use Lipase for additional flavour, add this now and mix well.
- Stir in your citric acid solution.
- Using a low setting on your stove, gently heat your milk to 32 degrees C. As the milk heats, it will start to curdle. Stir gently while the milk heats through.
- Once your milk has reached 32° C, add the rennet solution and stir gently but thoroughly, in an up and down motion, to ensure that the rennet solution is evenly distributed throughout your milk mixture.
- Remove your pot from the heat and allow it to sit for five to ten minutes or until you have a clean break. The curds will begin to form and appear to be shrinking and pulling away from the sides of the pot. If the curd is not firm enough to break cleanly as you move the knife within the curd, leave it for another five minutes and try again. The whey should be clear. If it is milky, wait a few more minutes. This is an important step as if you do not achieve a clean break, your cheese will not work.
- Cut the curd using a knife that reaches all the way to the bottom of the pot. First, cut it into strips about 2 centimetres wide; then do the same across the original cuts. Then slant your knife and make cuts on as great an angle as the confines of the pot will allow so that the result is the curd cut into evenly sized cubes.
- Place the pot back on the heat and heat your curds to 38° to 40° c, stirring gently to keep the curds moving around the pot.
- Once the desired temperature has been reached, remove the pot from the heat and stir for a few minutes more to help the curds dispel further whey. The longer you stir, the firmer the curds will be.
- Using a slotted spoon, scoop the curds into a microwaveable bowl.
- Gently press the curds with your hands and pour off as much excess whey as you can.
- Microwave the curds on high for one minute and then remove and again press out and drain off any additional excess whey. The cheese should begin to mass together and become sticky. Fold the cheese over itself and press like you are beginning to knead bread. It will become smooth and shiny and form into one piece.
- Place the curd back into the microwave and heat on high for 30 seconds. Remove from microwave and drain any remaining whey. Knead the cheese like bread again until it begins to cool. The cheese should be too hot to handle this time, and you may need to wear rubber gloves.
- Microwave again for 30 seconds. Knead again until the cheese is smooth and shiny, only this time; work in your salt as you knead. When the cheese stretches, it is done.
- If the cheese does not stretch, microwave it again for an additional 30 seconds. Note that the cheese will not stretch properly if it is below 58° C.
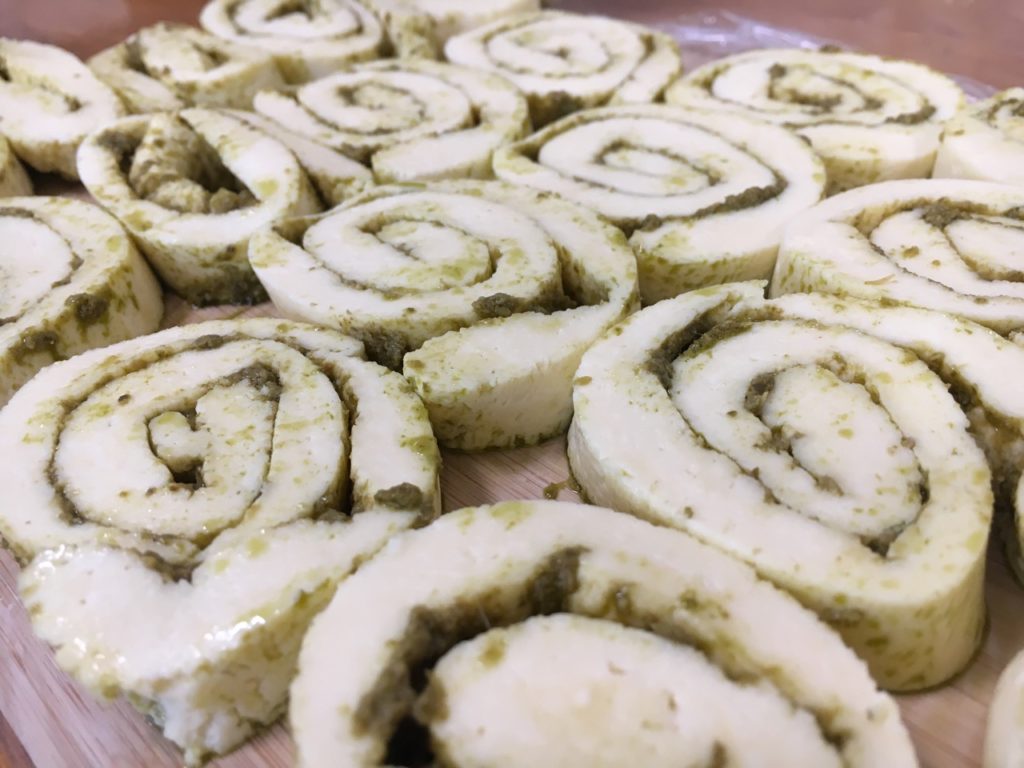
- Press the cheese into a long rectangle approximately 30cm x 20cm.
- Spread your pesto on the base and, moving quickly, roll lengthways into a log. Cut your pieces approximately 3cm wide.


Eat by itself, fried in a pan with a little bit of oil or add them to the top of your next sourdough batch with some sesame seeds; yum!
We would love to see your cooking creations, so tag us in your photos on Instagram or upload them in our Facebook post’s comments section. We can’t wait to see them all!
As always, live well.
Valerie
(Visited 323 times, 1 visits today)