As you may have noticed, I’m making a lot of soap. I am getting ready for Christmas, and if you want to give your handmade, cold-process soaps away for Christmas, you need to get them all made by the beginning of November so that they can cure and be ready to use by December 25th.
I used my favourite soap base, my shea butter soap, but I used different pouring techniques and colours. I also used a new soap mould, which I love and can highly recommend.
Let’s jump right in and get the party started.
Equipment
- Safety glasses or goggles should be worn to protect your eyes whenever you are handling soap-making ingredients.
- Rubber gloves
- Scales to measure all of your ingredients
- A pot to melt your solid oils in (or a large microwave-safe jug)
- Heat-proof jug to mix up your lye solution
- Thermometer: I use two when making soap. One for the oils and one for the lye solution
- Stick blender
- A loaf-shaped soap mould (1200 ml)
- Two 500 ms jugs, one for each soap batter colour
- Two small jugs to mix your colours in
- Several spatulas, I would say at least three.
- Curing rack and tray
- Soap Cutter
Ingredients
For the Soap Batter
- 200 grams of Coconut Oil (in the kit)
- 200 grams of Sustainable Palm Oil (in the kit)
- 400 grams of olive oil (available at your local supermarket)
- 50 grams of shea butter (in the kit)
- 122 grams of sodium hydroxide (from the hardware store)
- 273 grams of distilled water (In the cleaning section of the supermarket)
- One and a half teaspoons of Bergamot Essential Oil
- One and a half teaspoons of Lavender Essential Oil (French)
For the colours
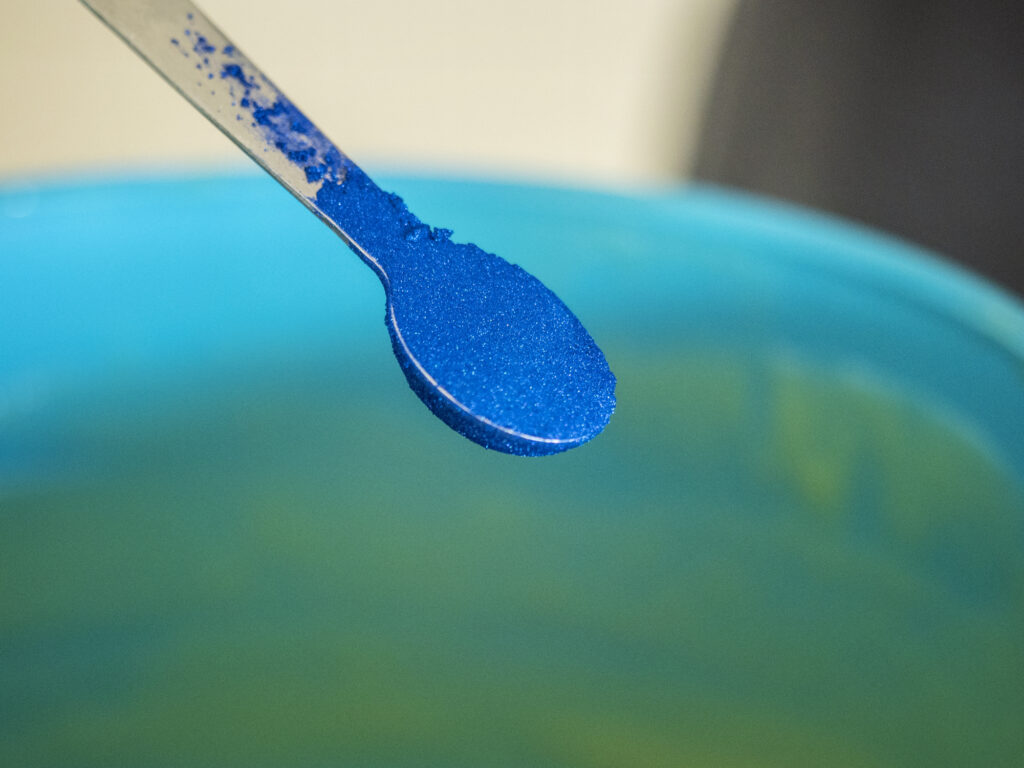
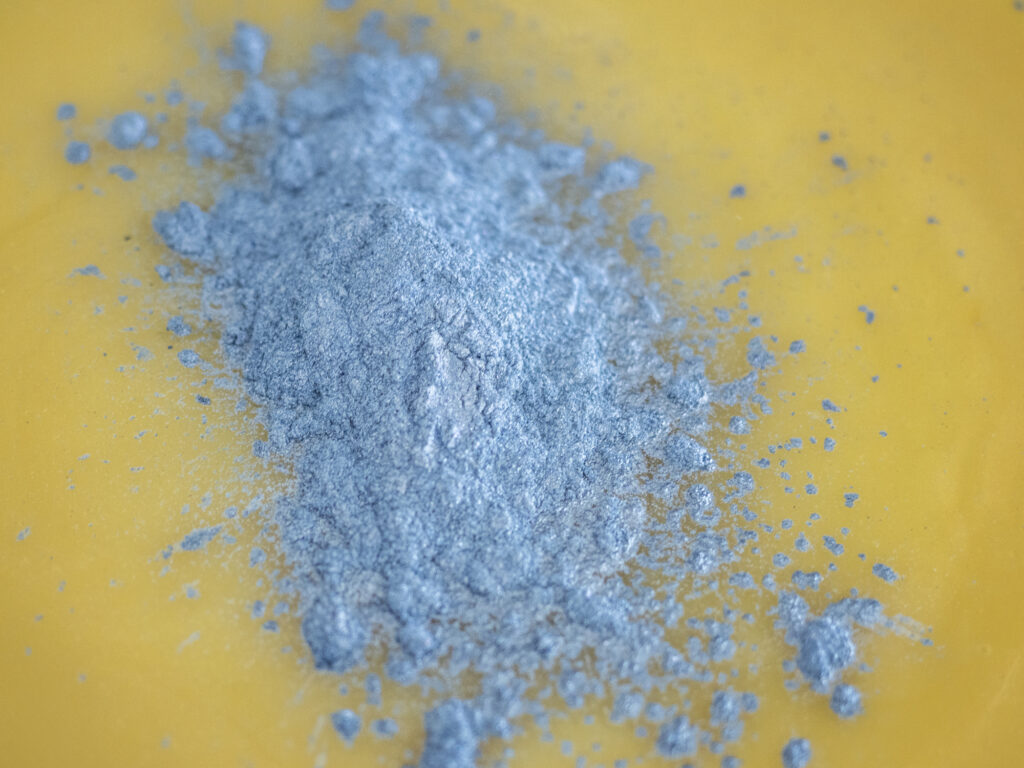
- Half a teaspoon of Cambridge Blue Mica.
- Half a teaspoon of Blackish Blue Mica.
- Two teaspoons of titanium dioxide, mixed with a small amount of oil to distribute it evenly
Instructions
- Before starting your soap-making, gather all the necessary equipment and ingredients. There is nothing worse than being partway through a soap recipe and discovering you do not have something you need. As soap making is a time- and temperature-sensitive process, you cannot stop what you are doing and go to the store to pick up what you don’t have.
- Put on your rubber gloves and safety goggles. Using accurate kitchen scales, carefully weigh out all your ingredients. I measure my caustic soda first, then place it in a small dry bowl. Then, I measure my distilled water and put it into my jug.
- Mix your caustic soda solution. Always add your caustic soda to your water. DO NOT ADD WATER TO YOUR CAUSTIC SODA. The chemical reaction can produce significant heat, resulting in fizzing and splattering. Use your silicon spatula to mix the caustic soda into the water. It is best to do this outside or in a well-ventilated room, as you do not want to breathe in any of the fumes that the heating of the solution may create through a chemical reaction. Your caustic soda solution will become quite hot and needs to cool down before it can be added to your oil. Once I have mixed up my caustic soda solution, I carefully place one of my thermometers into the jug to monitor the temperature as it cools.
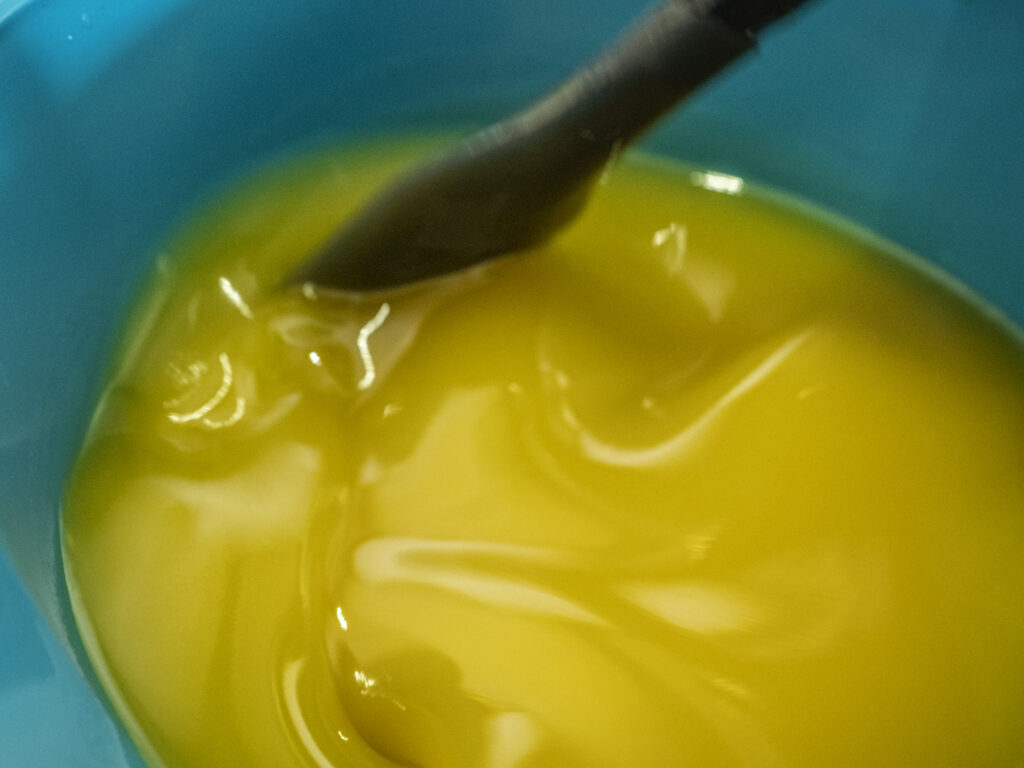
- Measure each of your oils. Place the coconut oil, palm oil, and shea butter into your soap pot or a microwave-safe jug, if you plan to use the microwave to melt them. Add your liquid oils to the melted solid oils, then place a second thermometer into the bowl of oils to monitor the oil’s temperature.
- Once your caustic soda solution is mixed and your oils melt, equalise their temperature until they are no more than ten degrees apart. Somewhere between 34 and 38 degrees works well for this soap. To do this, use hot and/or cold water in the sink and place the jug and/or bowl into the appropriate water.
- Preparing your colours: While you wait for the temperature of the oils and caustic soda solution to equalise, you can proceed with mixing your colours. Mix your titanium dioxide and oil in a small jug, ready to add to your soap batter once it’s made. I did not mix the two blues with anything, as I was confident I could mix them directly into the soap batter and still get an even distribution.
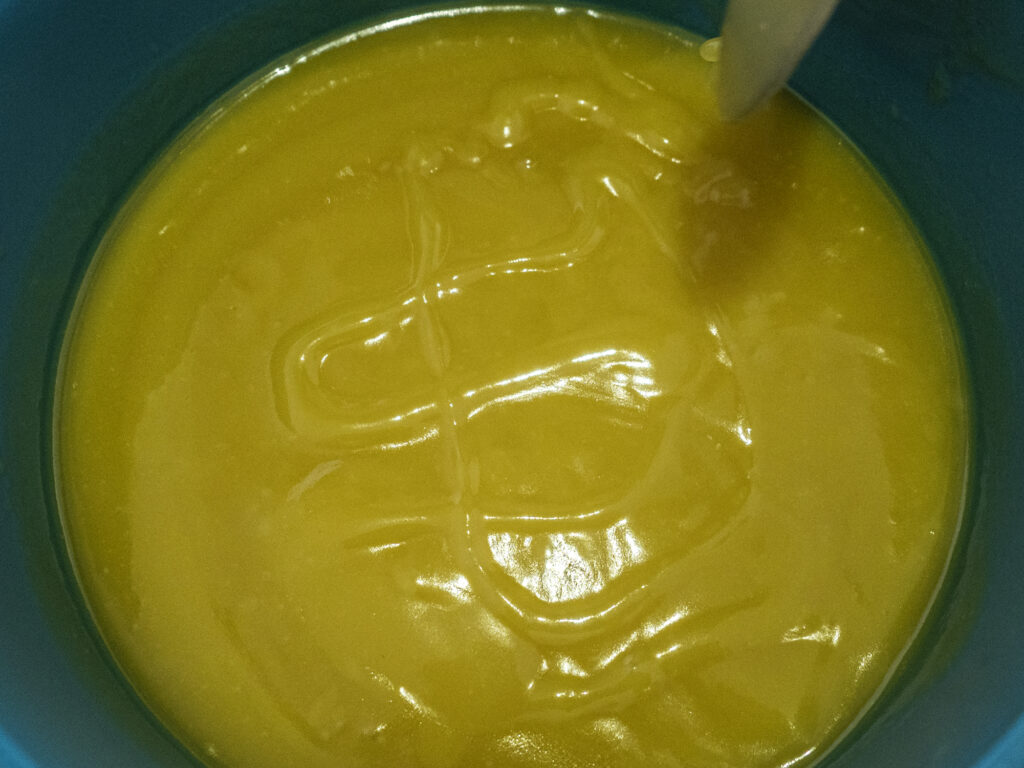
- Once the oils and the caustic soda solution reach a similar temperature, or within a few degrees, you can pour the caustic soda solution into the oil mixture. Wearing rubber gloves and safety glasses, pour the caustic soda solution into your oils while mixing with a spatula.
- Use a stick blender and mix the oils and caustic soda solution until the mixture reaches a light “trace”. Trace is when the oil and caustic soda solution are combined so they will not separate. This is called an emulsion. Don’t mix for too long, as doing so will cause the soap batter to become too thick to work with. To test for trace, use a spoon to pick up a small amount of the soap mixture and drizzle it across the top of the remaining soap mixture. If it is not ready, the drizzle will immediately sink back into the soap mixture, leaving no trace. However, a small amount of the soap mixture drizzled onto the remaining soap mixture leaves a faint pattern before sinking back into it when it is at “trace”.

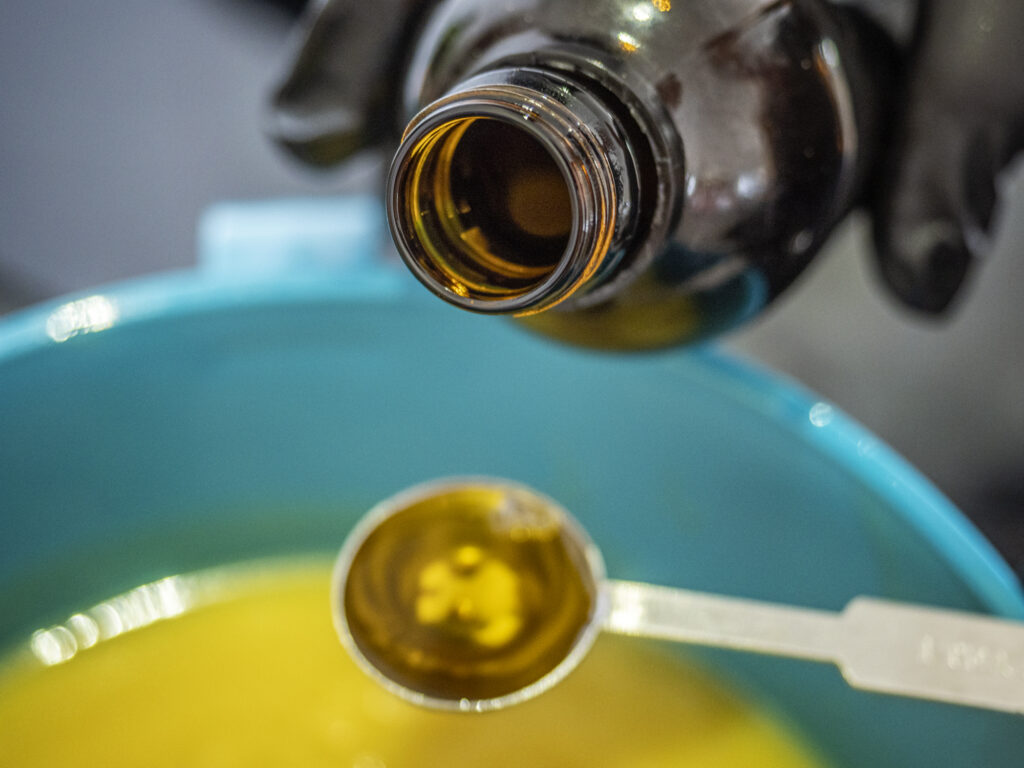
- You can mix in your essential oil with a spatula once your soap has reached an emulsion stage.
Colouring and Pouring
- Take the soap batter and calculate the total weight (1235 grams). Divide it by three (411 to 412 grams)
- Place one of the 500 ml jugs on the scales and tare it to zero. Pour the soap batter into this jug until you reach 411 grams. Set this aside. This is for your white.
- Do the same with the other two jugs: one for the Blackish Blue and another for the Cambridge Blue Mica. Don’t worry about being super exact. It will all work out.
- Mix one teaspoon of the white colour mixture into the soap batter jug. If it doesn’t seem white enough, add a little more.
- I mixed the mica directly into the soap batter with a spatula for the Blackish Blue and Cambridge Blue.
- Now you are ready to pour. Place a large jug on the counter using a rolled-up facecloth to elevate one side.
- Pour some dark soap mixture into the jug, on the opposite side to the lifted side, followed by the white and then some light-blue soap mixture.
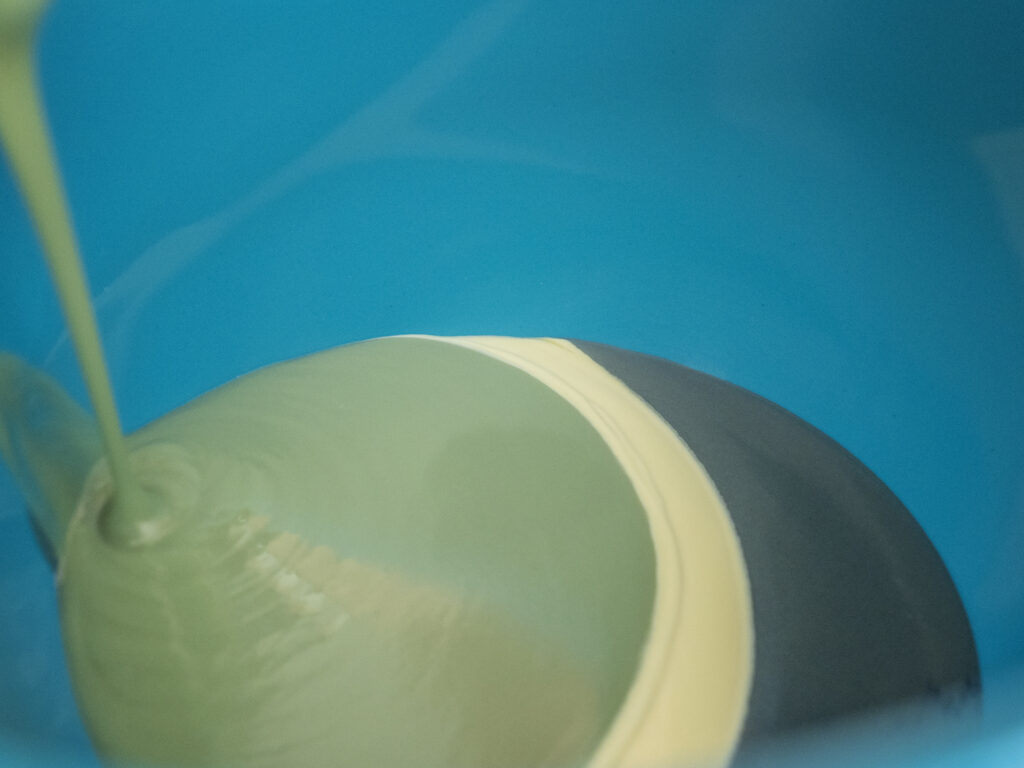
- Then, return to the dark colour and repeat (dark, white, light). Continue to rotate through the colours, creating layers of colour as you go.
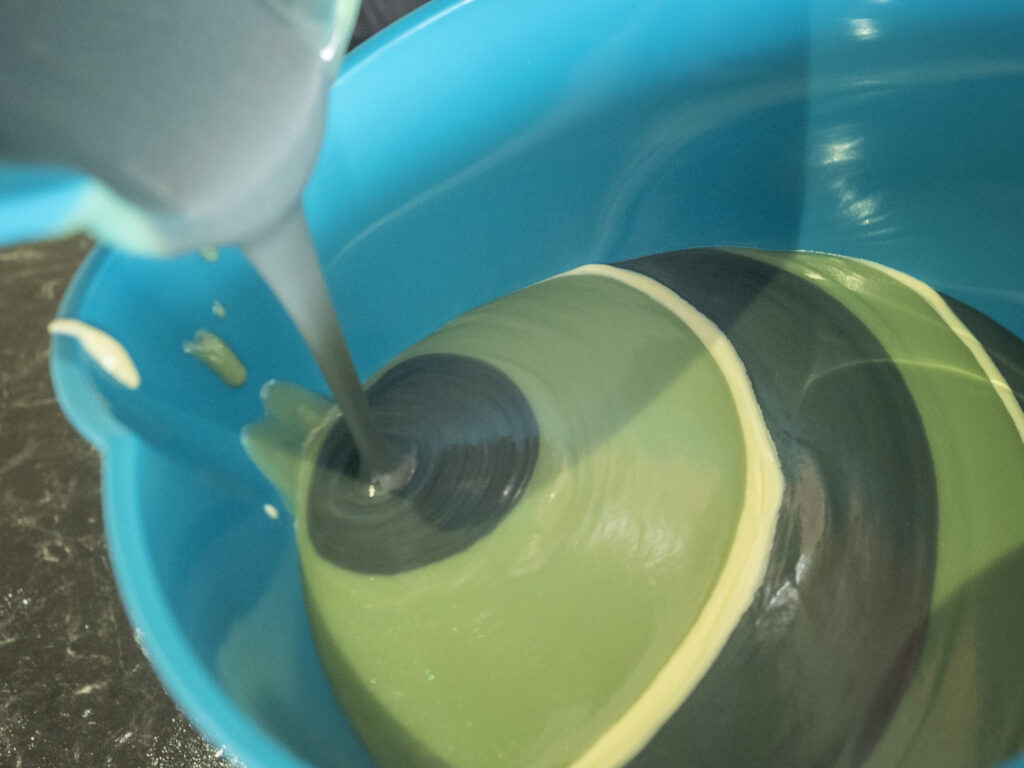
- Once you have poured all the soap batter, in layers, into the large jug, you are ready to pour it into your soap mould.
- Using a loaf mould, place the mould on the counter. Use a rolled-up facecloth under one side to lift it. I put the cloth under the side of the mould closest to me and poured the mixture into the far side of the mould.
- Start pouring into the right-hand corner and move to the left. Continue pouring, alternating between right to left and then back, left to right.

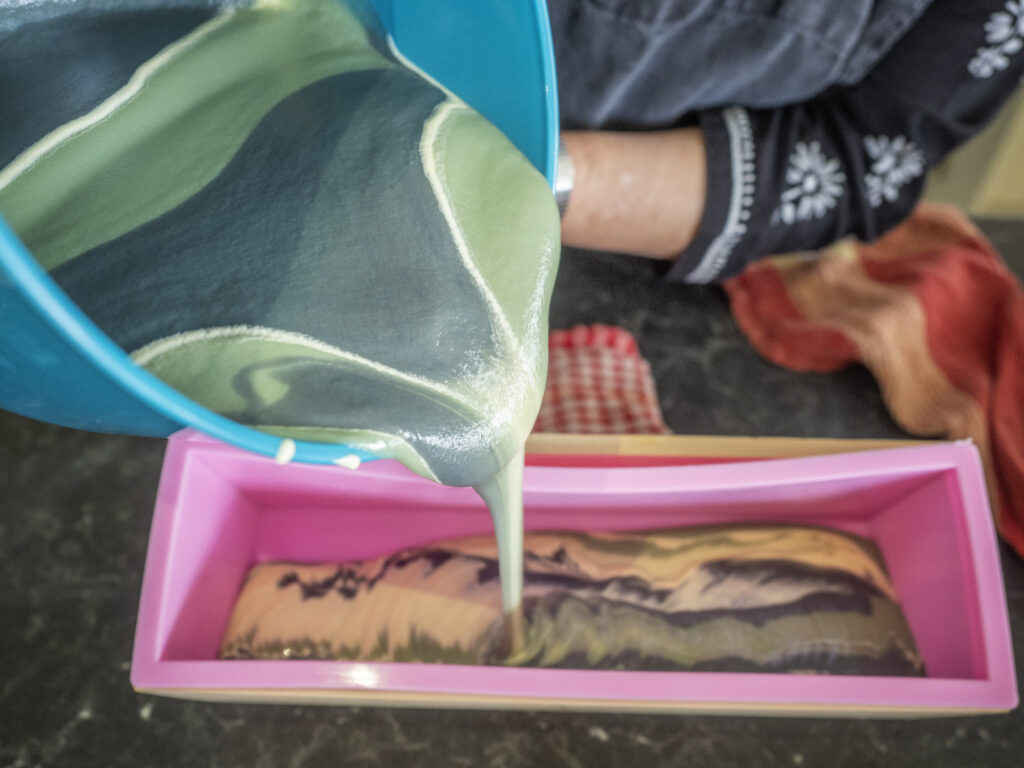
- As the mould starts to fill up, remove the cloth so that the mould becomes level and continue to pour.
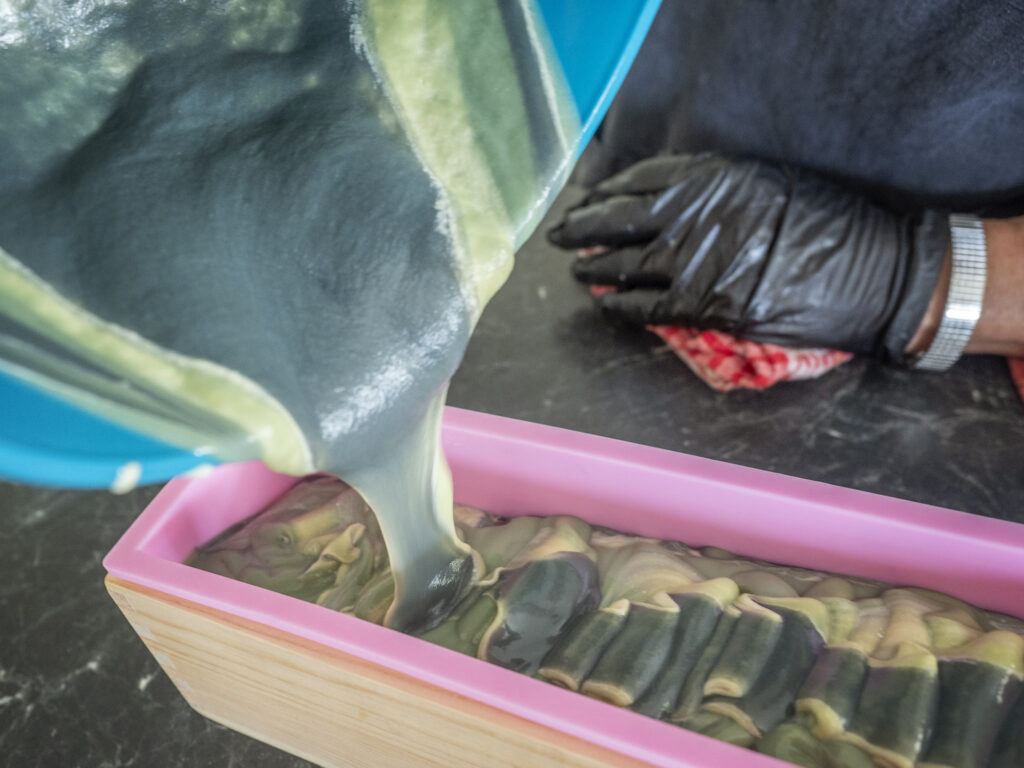
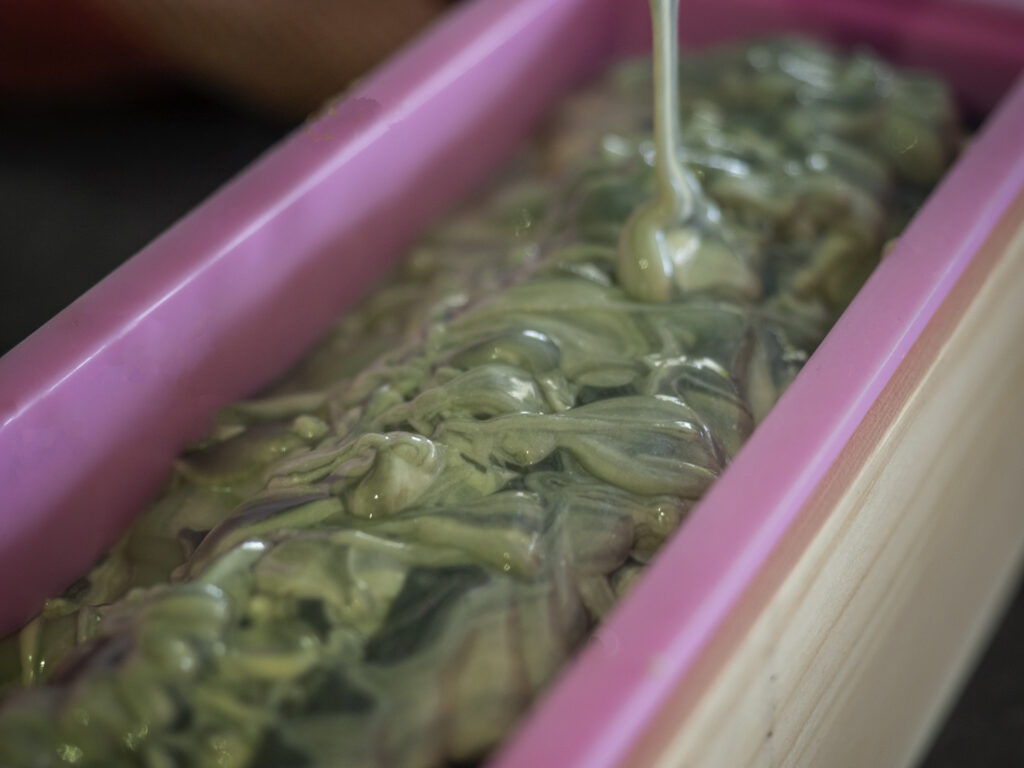
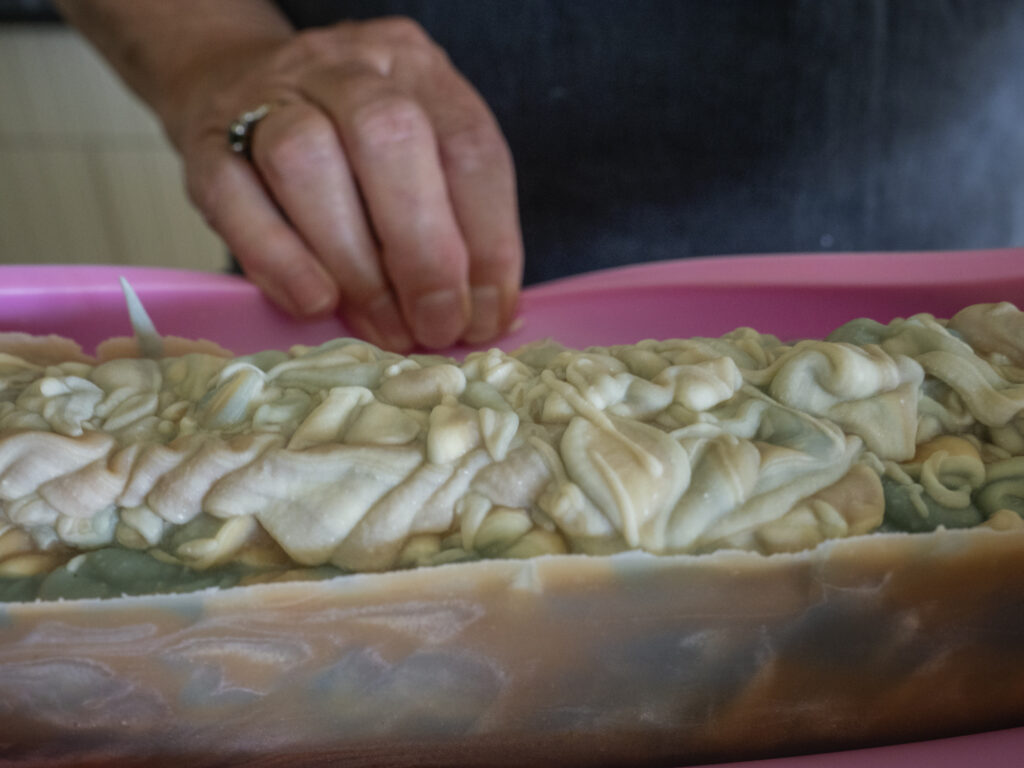
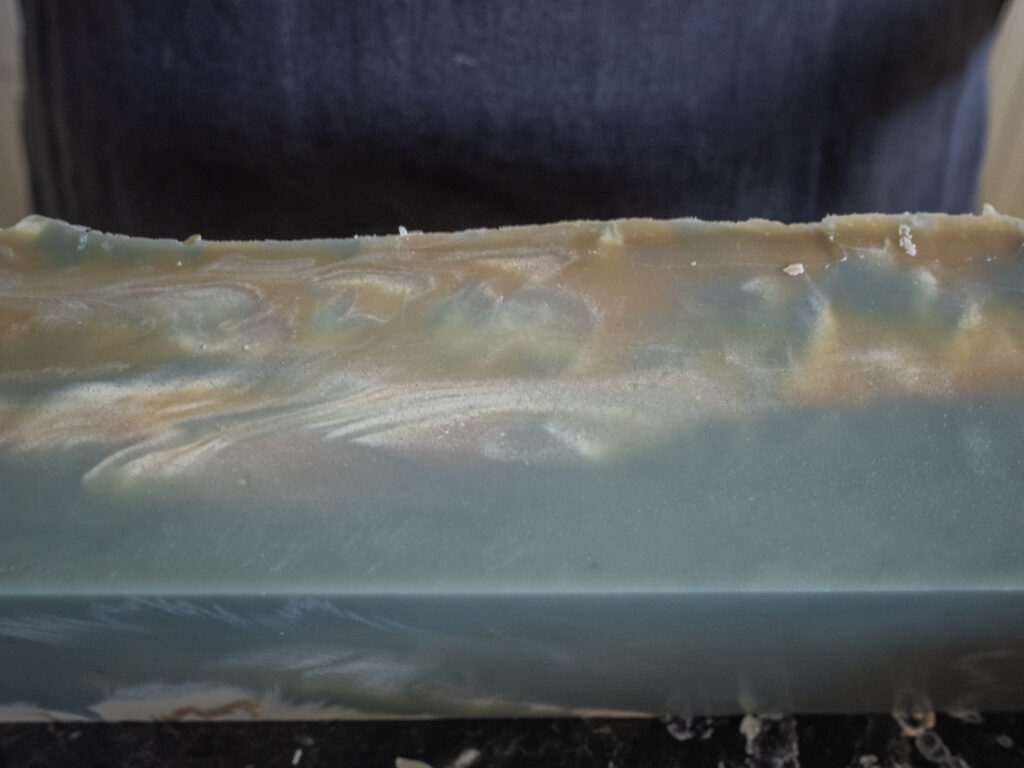
- As I poured, the soap batter began to thicken. I took advantage of this by pouring the last of the batter on top, creating a colour mixture and top design that I liked.
- Once the soap is poured, it is set aside in the mould to cure and harden. It is essential to keep the soap at a warm temperature. Cold-process soapmaking involves a chemical reaction called saponification, where oils and lye (sodium hydroxide) combine to form soap and glycerin. This reaction continues even after the soap is poured into moulds. Keeping the soap warm promotes and accelerates saponification, ensuring it fully transforms into its final state.
To keep cold process soap warm after pouring it into moulds, you can use several methods:
- Insulation: Cover the moulds with an insulating material such as towels, blankets, or a foam board to trap heat and keep the soap warm.
- Heating Pad or Blanket: You can use a heating pad or a heated blanket to keep the soap warm. Be sure to monitor the temperature to avoid overheating.
- Curing Oven: Some soapmakers use an oven set to a low temperature to keep the soap warm and promote saponification.
Cutting your soap
- The following day, remove your soap from the mould. The soap should be hard enough to do this without causing any damage to the soap. If the soap is still too soft, leave it another day.
- I cut my soap with the wire soap cutter. I like the clean cut this gives me.
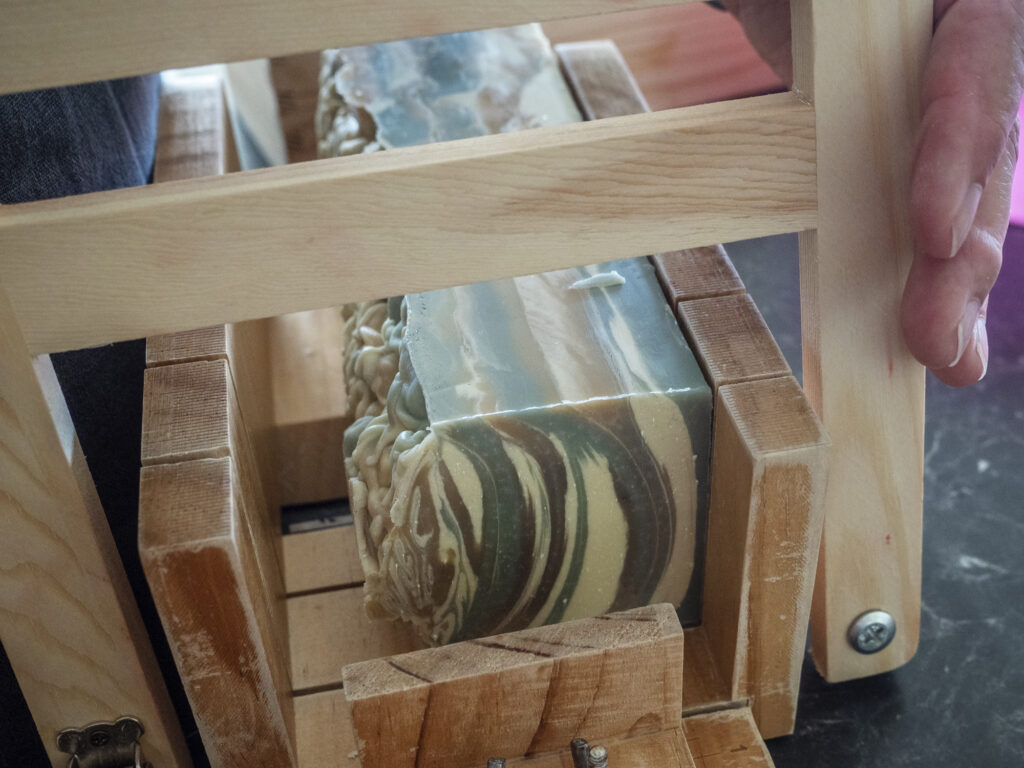

- After they are cut, I clean them up a little, shaving off any rough edges that do not look smooth.
- Place them on a tray to cure for six weeks before using.
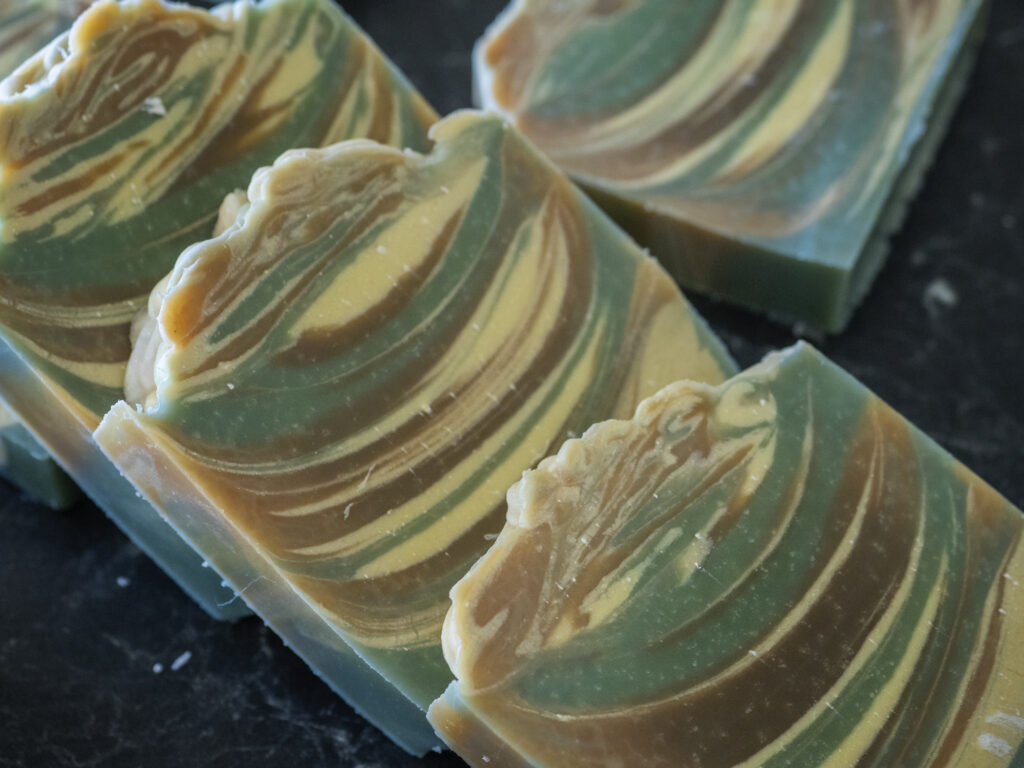
I was so impressed with how this soap turned out. The blues mixed in with the yellow colour of the soap batter, created by the colour of the olive, gave me beautiful colours that I adore.
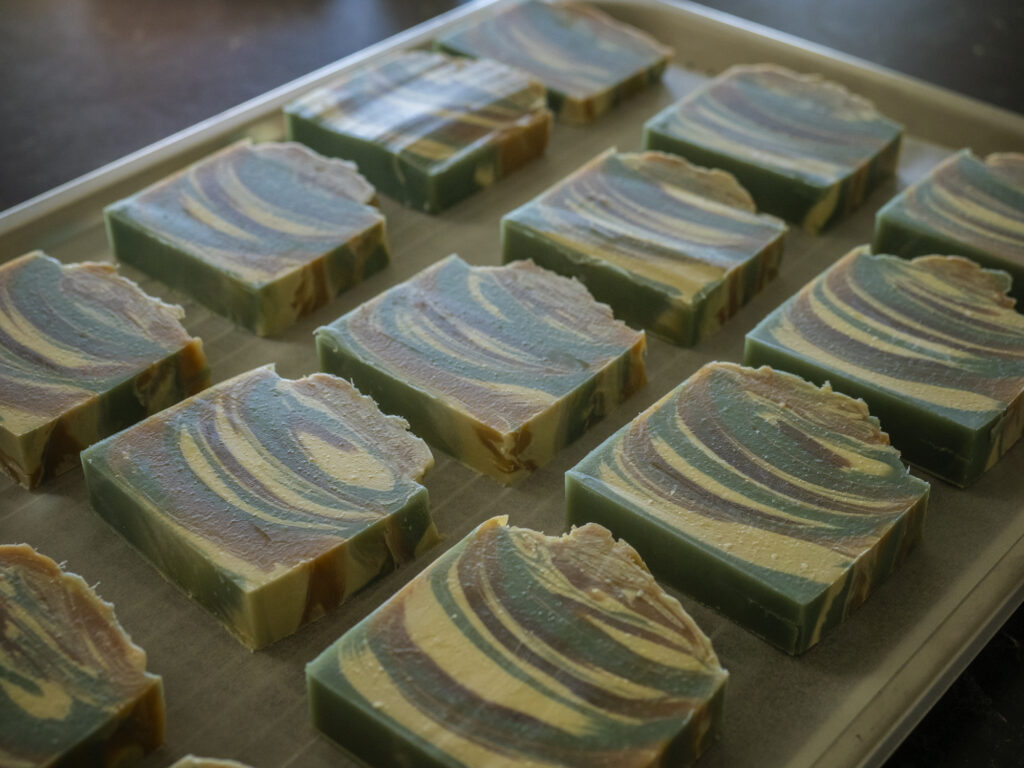
They are now happily curing on their tray and will be ready in time for Christmas gifts. A gift that does not cost the earth but was made with love and care. This is simple living.
I hope that you give this one a go.
As always, live well.
Valerie