Feta is such an easy cheese to make and one I call ‘the teaching cheese’. Whenever someone asks me how to make Camembert or Brie, I tell them to make Feta first. Once you have mastered Feta, you are ready to move on to a more challenging cheese. Plus, the bonus to using Feta as a teaching cheese is that it is delicious.

I like to use Feta in my cooking, serve it with salads, or just have it as a part of an antipasto platter. Add a glass of good red wine, and who needs dinner? Follow my simple recipe to make your own and amaze everyone with your new superpower.
You will need the following:
Ingredients:
- 4 litres of milk
- ⅛ teaspoon of Calcium Chloride diluted in ¼ cup of non-chlorinated water
- Mesophilic Hard Curd Cheese Culture (see the packet for the amount to add)
- ¼ tablet of rennet or ¼ teaspoon of Liquid Rennet diluted in ¼ cup of non-chlorinated water
- 1-2 tablespoons Cheese Salt
Equipment:
- A stainless steel pot to place your milk in
- A second, larger pot to place your first pot in, to act as a water jacket, so you can indirectly heat your milk
- Dairy thermometer
- Stainless steel perforated spoon
- Stainless steel curd knife
- Stainless steel ladle
- Loose-weave cheese-making cloth
- 2 x Feta baskets
Directions:
• Place your milk into a large stainless steel pot and then place this pot into your second, larger pot with water in it to act as a water jacket. Add your calcium chloride and mix well.
• Using indirect heat, slowly heat your milk to 30°C. Add your starter culture and, stirring gently, mix in well.
• Allow to ripen for one hour, maintaining the temperature at 30°C.
• Add your rennet solution to the milk and stir in gently, using an up-and-down motion for one minute, ensuring that the rennet is evenly distributed throughout the milk. Cover and allow to rest undisturbed for one hour, while maintaining the temperature at 30°C.
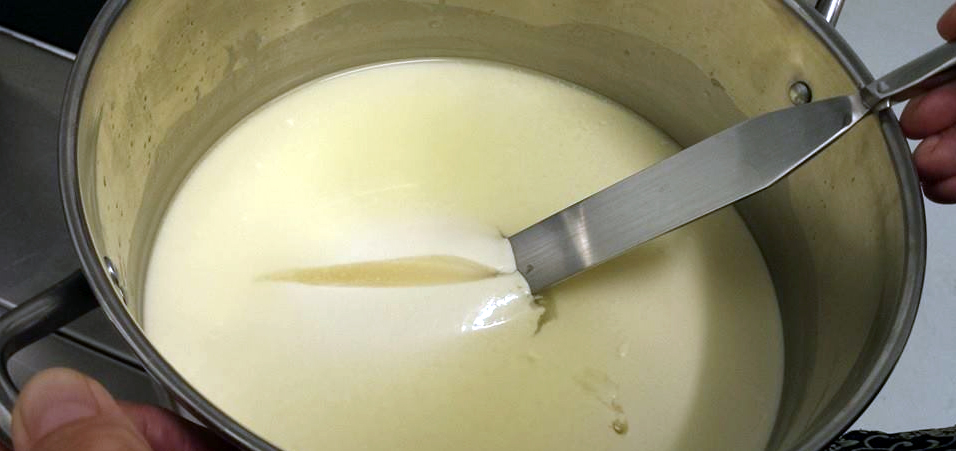
• Check for a clean break. If the curd is not firm enough, leave it for another five minutes and check again. Be patient and wait for a clean break.
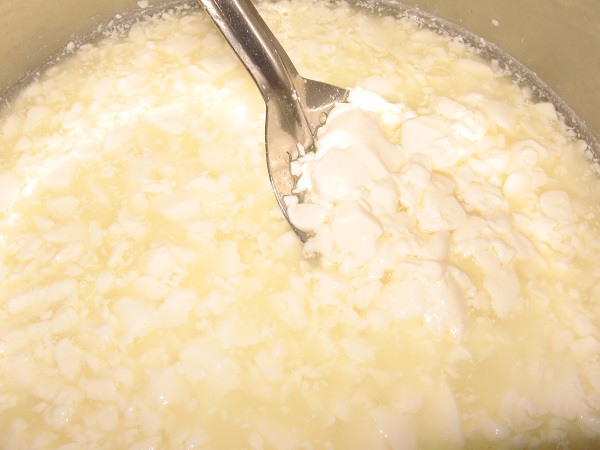
• Once the curd is firm enough and gives a clean break, cut the curd into one to one-and-a-half centimetre cubes. Allow the curds to rest for 10 minutes.
• Gently stir the curds for 20 minutes, while maintaining the temperature at 30°C. Be careful not to be too rough and shatter the curds.
• Line your two Feta baskets with a loose-weave cheese-making cloth. If you take a 90-centimetre square of cloth, you can cut it into four quarters, so you have two for use now and two to put away for later.
• Gently ladle your curds and whey into your lined baskets. Be sure to catch the whey for future use in cooking or for adding to your brine solution, if you intend to brine your Feta. If you do not get all of your curds into the basket, you may need to wait a few minutes for the curds already in the basket to settle. Then, once there is room, add the remaining curds and whey.
• Once both baskets are full, and you have all of your curds in the baskets, fold the cloth over the top of the curds and then place one basket on top of the other so the weight of the curds in the top basket is pressing the curds in the bottom basket. You will need to swap the baskets over every 15 minutes for the first 90 minutes and then every hour for the next five to six hours. This is to ensure that the curds in both baskets are pressed evenly.
• If you like your Feta drier, you may press the cheese in the baskets by placing a filled or partially filled two-litre milk bottle on top of the top basket to act as additional weight. Whether you do this and for how long will be a matter of personal taste and experience.
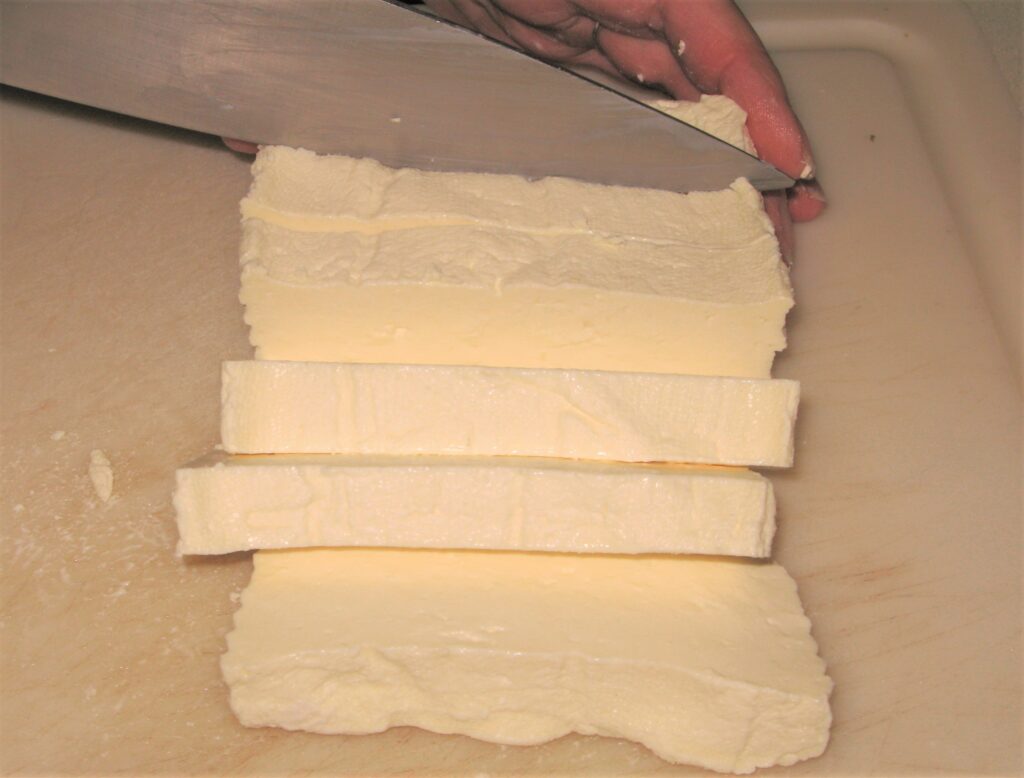
• Once the cheeses have drained, remove them from the baskets, peel away the cheese-making cloth and on a clean cutting board, cut the Feta into one-and-a-half centimetre cubes.
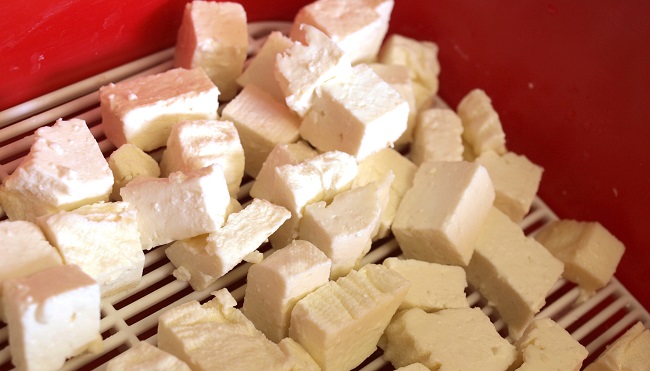
• Place your cubes of Feta into a storage container with a grid in the bottom so that the Feta will not be sitting in any additional whey that drains from the cheese.
• Sprinkle the cubes of Feta with one to two tablespoons of cheese salt. I suggest starting out with one tablespoon and then decreasing or increasing this to taste as required.
• Store in the fridge and allow to age for three days before eating. This allows the Feta to develop more flavour. This Feta will keep in the fridge for one week to 10 days.
You will get about 750 grams of Danish-style Feta from four litres of good-quality, full-cream milk. Everything you need is in the Green Living Australia Feta Kit.
For this recipe and many more, check out my book Home Cheese Making in Australia.
I hope that you enjoy this recipe. It is such a great cheese to start with.
As always, live well.
Valerie
Hello there,
I just found your blog from a friends blog roll (find the best sites that way!) Making feta is one of my favourite pastimes, in fact there is lots of interesting info on your blog, I will defenitely be following along!
Hello Gillian:
Thank you for your positive feedback. So you are in the tropics, and I am in The Granite Belt, the coldest place in Queensland.